
++ Wordpress Plugin Installation
Installing the Bread and Butter plugin on your WordPress site is incredibly simple and takes only a few clicks. Whether you are running a standard website or a complex application, this single plugin is all you need to get started.
Option 1: Install via WordPress Search (Recommended)
This is the easiest way to install the Bread & Butter plugin.
- Search: Log in to your WordPress Admin dashboard. Navigate to Plugins > Add New.
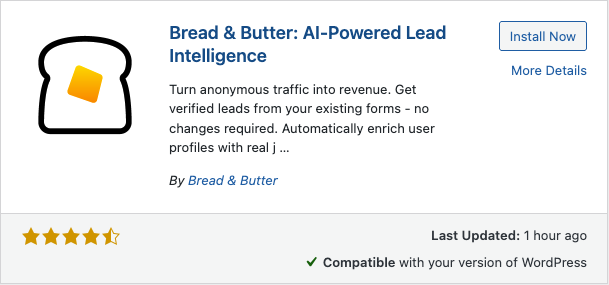
- Find: In the search bar on the top right, type "Bread & Butter".
- Install: Locate the Bread & Butter plugin in the search results and click Install Now.
- Activate: Once the installation finishes, the button will change to Activate. Click it to complete the setup.
Connecting Your Website to Bread & Butter
Once the plugin is successfully installed and activated, you will be prompted to complete your First-time configuration to connect your website to our cloud.
Connecting your site is essential to activate your lead intelligence engine. This secure link allows Bread & Butter to instantly upgrade your existing forms, unlock AI lead scoring, and track exactly what converts into actual revenue utilizing our highly precise server-side tracking.
- Under the Connect your Website step, we highly recommend using Option 1: Automatic Setup.
- Enter your email address and click Connect with Email, or simply click Continue with Google. This will automatically link your site to our AI profile enrichment engine in under 30 seconds.
💡 Pro Tip: Choosing your account email: If you manage multiple website or clients, be sure to use a primary email address that works across all of your websites. Because Bread & Butter never charges per seat, you can always invite additional admin users later, including yourself under a different email address, once the initial setup is complete.


Congratulations, you are officially fully connected!
There are absolutely no more mandatory steps required to start capturing data. However, to ensure everything is communicating perfectly, we highly recommend performing a quick test:
- Visit your website and fill out one of your existing lead forms just like a normal visitor would.
- Log in to your Bread & Butter Dashboard to verify that the captured data appears in your system.

While we have outlined a few optional onboarding steps to help you maximize your new intelligence engine, your core setup is complete. You are good to go!
Troubleshooting: No Activity in the Bread & Butter Dashboard? If you have installed the plugin and connected your website but do not see your visits in the Bread & Butter dashboard, please check the following:
- Clear Your Cache: This is the most common issue. If you use a caching plugin (like WP Rocket or Autoptimize) or have server-side caching, clear it immediately after installation to ensure the tracking script loads.
- Test in Incognito: Your visits might not be tracked if you are logged in as an Administrator (depending on your settings). Open your site in an Incognito/Private window to generate a fresh test visit.
- Check for Conflicts: Ensure you have not also installed Bread & Butter via Google Tag Manager. Running both simultaneously will cause errors.
- Verify Connection: In your WordPress admin, go to Bread & Butter and confirm that the status says "Connected".
Using WooCommerce or MemberPress? Good news! You do not need a separate plugin or a complicated custom setup. Simply follow the standard WordPress installation instructions above, and our platform will seamlessly integrate with your ecommerce or membership tools right out of the box.
Option 2 – Manual ZIP Installation
This method is best if you prefer manually handling files. For an easier method, try searching "Bread & Butter" directly in the WordPress Plugin store (Option 1).
- Download: Get the latest version of the plugin here: Download Bread & Butter ZIP
- Upload: Log in to your WordPress Admin dashboard. Navigate to Plugins > Add New and click the Upload Plugin button at the top.
- Install: Choose the
bread-butter.zipfile you just downloaded and click Install Now. - Activate: Once the installation finishes, click Activate Plugin. You are now ready to set up!
Not on WordPress? See 'How to Install Bread & Butter on Your Website.'
Need help? Book your free white glove installation.