
Mailchimp
The Bread & Butter + Mailchimp integration allows you to automatically add or remove users from a Mailchimp Audience based on their activity on your website. For example, when a user signs up, you can add them to a "Subscribers" list to receive a welcome email or weekly updates.
Step 1: Connect Mailchimp
To set up the integration, you first need to generate an API Key in Mailchimp and then enter it into Bread & Butter.
1. Get your API Key
- Log in to your Mailchimp Account.
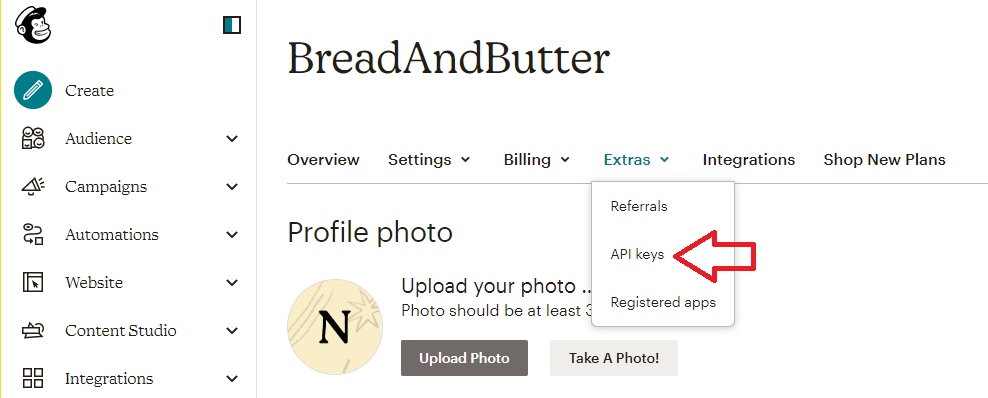
- Click on your user icon at the top right, then select Account & billing (or Profile, depending on your plan).
-
Click the Extras dropdown menu and select API keys.
-
Click Create A Key.
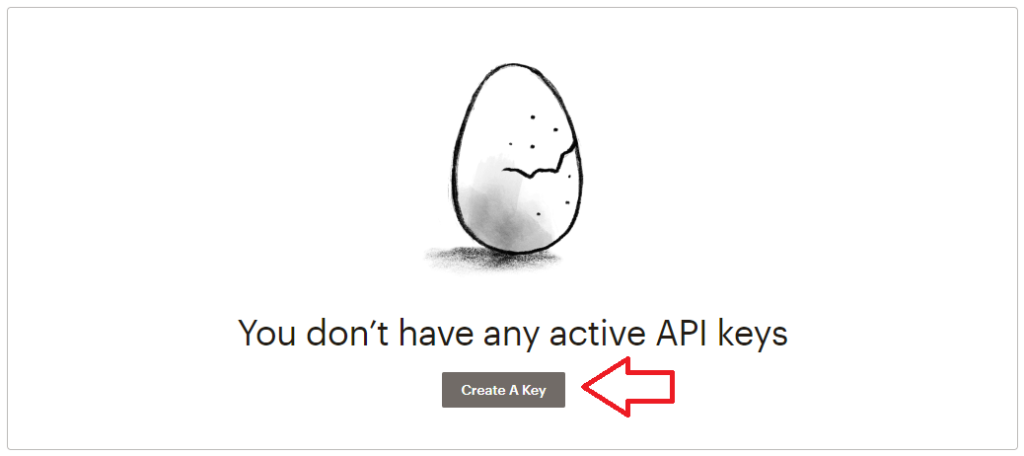
- Name your key (e.g., "Bread & Butter Integration") and click Generate Key.
- Copy the API Key to your clipboard.


2. Add to Bread & Butter
- Log in to your Bread & Butter Dashboard.
- Click Automation > Integrations on the left side menu.
- Under the Integrations section, click on the Mailchimp logo to create a new integration.
- Enter a Name for the integration (optional, the default name will be 'Mailchimp').
- Paste the API Key you generated in the previous steps.
- Click Save & Close.
Step 2: Set up Rules
Once connected, you need to create a Rule to tell Bread & Butter which Mailchimp Audience to update and when.
1. Get your Audience ID
- Log in to Mailchimp and click Audience in the left menu.
- Click All contacts.
- If you have more than one audience, click the Current audience dropdown and select the one you want to work with.
- Click the Settings (3 dots) dropdown menu (top right) and select Audience settings.
- On the right side, under Audience ID, you will find a string of letters and numbers (e.g.,
a1b2c3d4e5). Copy this ID.
2. Create the Rule in Bread & Butter
- Click Automation > Integrations on the left side menu.
- Select the Mailchimp Integration you created in Part 1.
- Under the Rules section, choose the Filter Conditions that will trigger this rule (e.g., EVENT: Email Verified, LEAD SCORE: 6,7,8,9,10). You can manually refine the filter condition, or pick from the pre-configured filters that were previously saved for your account.
- Enter a descriptive Name for the rule (e.g., 'Newsletter Signup').
- Paste the Audience ID you copied from Mailchimp.
- Select the Action: Add to Audience or Remove from Audience.
- Note: "Add to Audience" will create a new contact or update an existing one.
- Click Save & Close.
Your integration is now live! When the event occurs, the user will be added to (or removed from) your specified Mailchimp Audience.